
If you need to gate content and don’t want to fork out the cash for a premium plugin, or want to avoid a plugin altogether to have full control, you can easily do this with just Advanced Custom Fields. To get you started, we’ll start with basic examples. However, keep in mind the possibilities are endless.
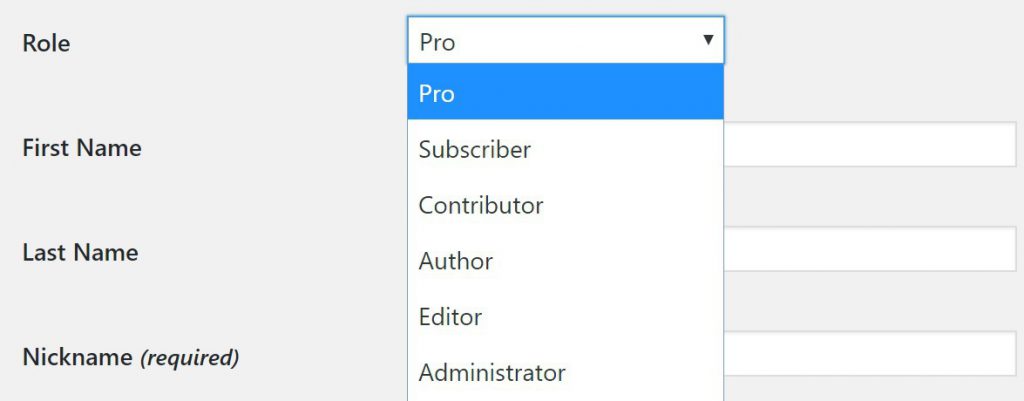
For this specific example, we are going to create a list of items, using eBooks. We want users who are logged in and have a user role of “Pro” to see the entire list of ebooks. For non-logged-in users, we want them to see only a select few ebooks. Pro by default is not a user role so we are going to add a custom role using the add role function.
How to setup a custom role in WordPress
We can now see that a user can be updated to the Pro role.
Setup Advanced Custom Fields
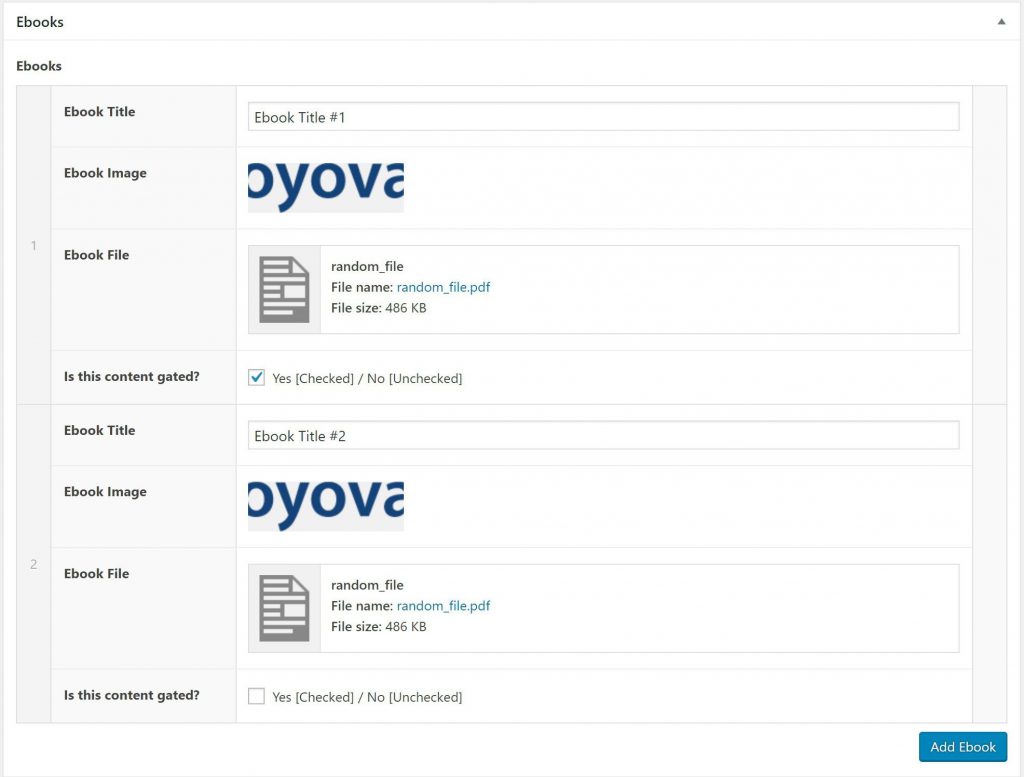
We are now going to create a new Field Group using the repeater field. This will allow us to add multiple list items and each individual item will have the option to allow it to be gated or not gated.
This is a basic example of what your new field group will look like:

I would suggest creating a new template for this page. From my example, I will create a page-ebook.php and load the Field Group on that page template.
This is what it will look like when you edit that page and start adding items:
Code the field group and gate it
Where your code lives will completely depend on how your theme is built out. You may want this in the main part of the template or you may want to section it out into a subfolder of components, content, template parts, etc. I prefer to separate my code to stay organized so I will use get_template_part and put my code in a components folder within my theme directory.
This is what my final code looks like:
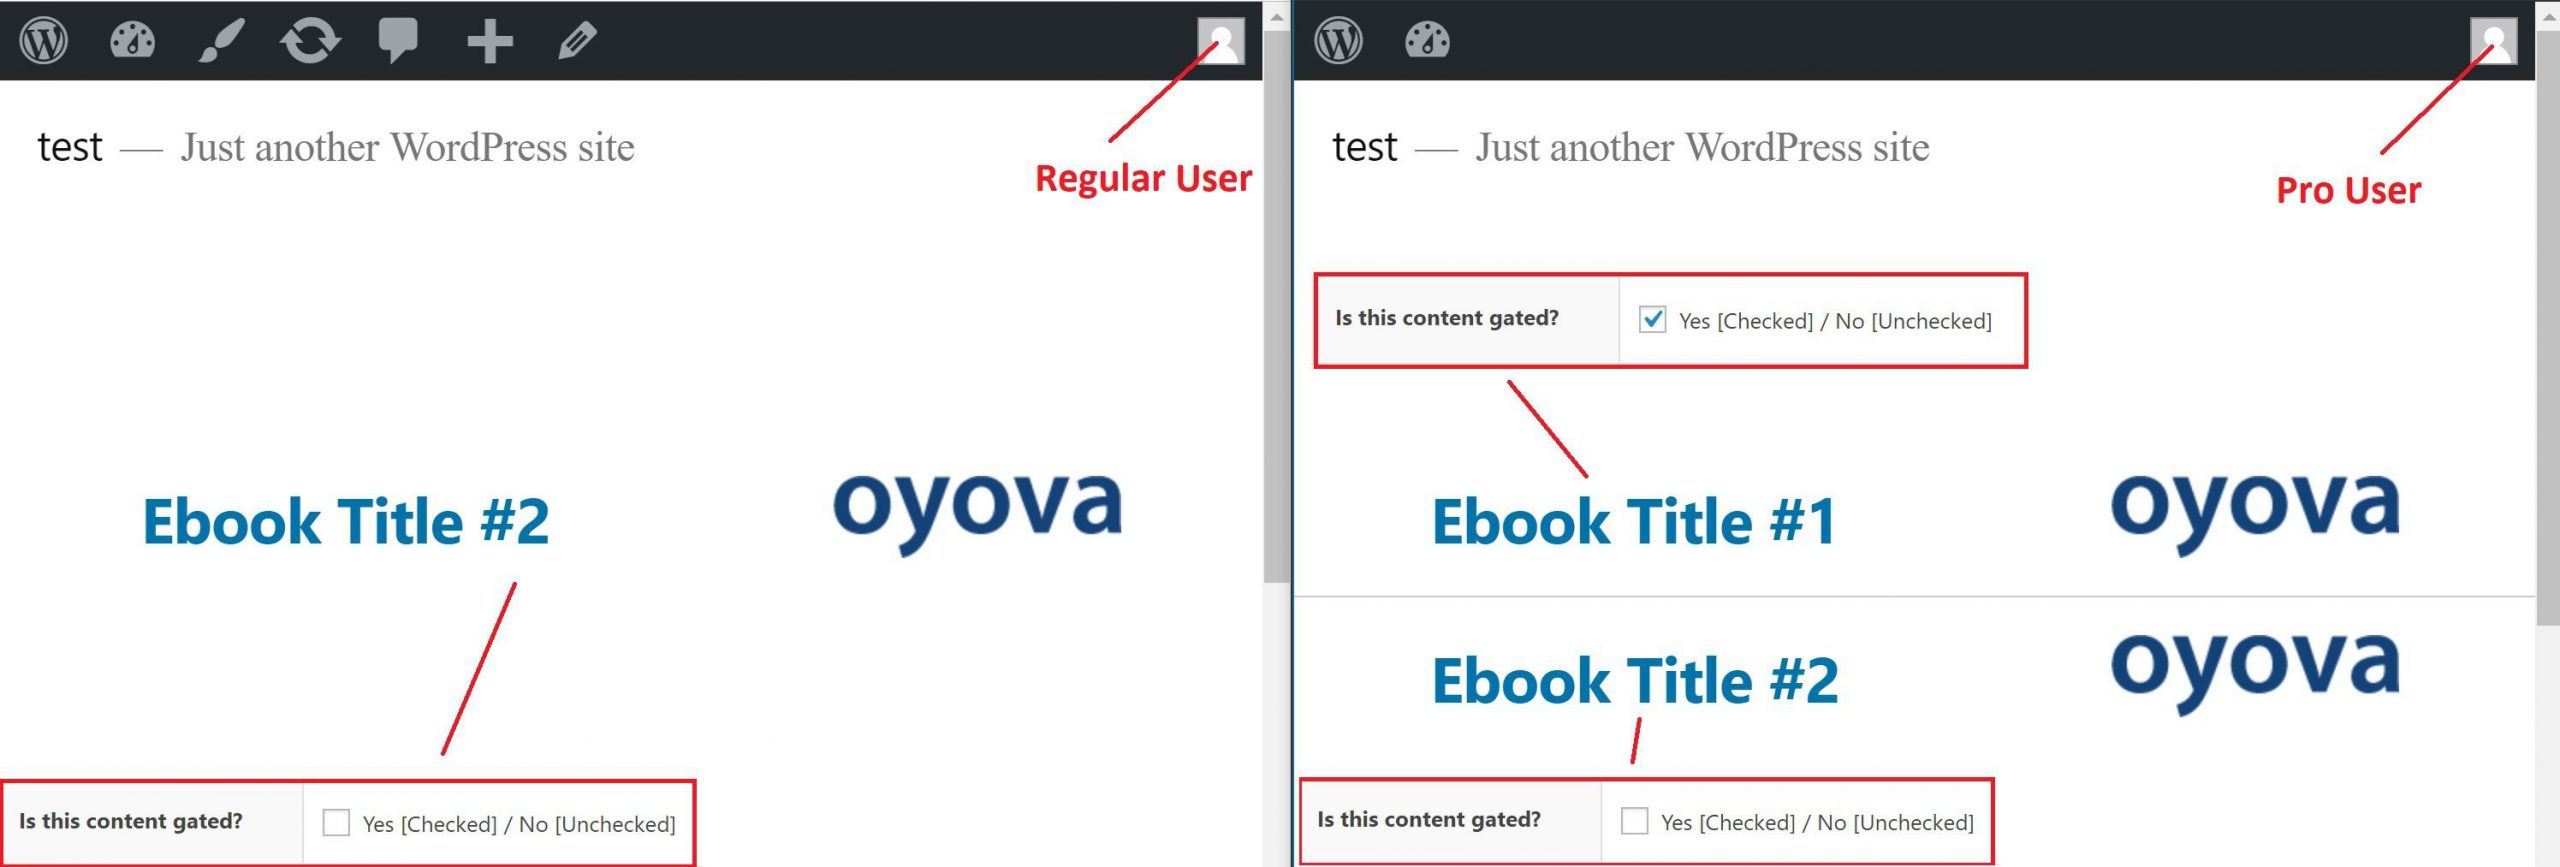
I left comments in the code but it’s essentially finding the current user’s role. If that role is pro, it will show the content we checked as gated and anything ungated. If the user is not logged in, it will show the content we decided is not gated.
This is what it looks like on the front end for the different user roles:
This is a simple example to get you going but you can see how it can easily be configured to gate content without the use of a premium or bloated plugin.
Have questions? Drop me a line in the comments section.
Related Posts

Top 10 Reasons Why Your Home Services Website Isn’t Cutting It
In 2026, homeowners don’t flip through the Yellow Pages or ask around the neighborhood before hiring a plumber,...
Read More
Best Ecommerce Platform for SEO in 2026: Shopify, WooCommerce, and WordPress Compared
Choosing the best ecommerce platform for SEO in 2026 is not just about picking the most popular option....
Read More
Marketing Attribution for High-Intent Leads in 2026: How to Track Calls, Forms, and Offline Sales Without Broken Data
If your company depends on quote requests, consultation calls, demo forms, booked meetings, or sales conversations that happen...
Read MoreOur Awards